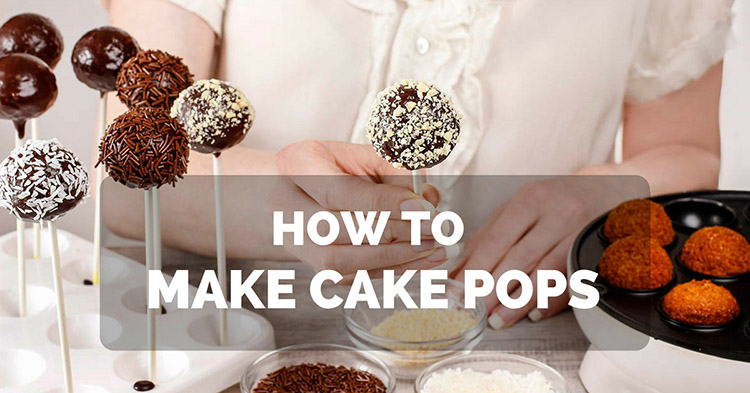
Holiday season is approaching, if you are like me who tends to get tired of those leftover cakes and not knowing what to do with them, I have the perfect and very simple cake pops recipe just for you.
Most people think making cake pops is as complicated or as difficult as baking cakes, but it is not.
In this tutorial, I will be teaching you a step-step guide on how to make cake pops especially for the beginner’s out there. This is so easy that you could let the kids help you out!
- If you don't have some leftover cake, follow this tutorial from Top to Bottom.
- If you have some leftover cake, you won’t need to bake anything so just look into the ingredients for the frosting and coating and GO STRAIGHT TO STEP 6.
More...
How To Make Cake Pops Effortlessly?

How To Make Cake Pops
THINGS YOU’LL NEED IN MAKING CAKE POPS (For No Left-Over Cakes ONLY)
This cake pops recipe is good for about 60 cake pops
- 1 ¼ cups (150g) of flour
- ¾ tsp(3.5g) of baking soda
- A pinch of salt
- ¾ cup(175ml) of buttermilk
- 1 ½ tsp(7.5ml) of white vinegar
- 1tsp (5ml) of vanilla extract
- 1 Large egg
- 1 ½ tsp (6.5g) of cocoa
- 1 ½ (7.5ml) of red dye
- 8 tbsp (120g) of butter
- 1 cup(200g) of sugar
Since we will be making a Red Velvet Cake Pops, we will be using a Cream Cheese Frosting.
Here’s what you’ll need for the Cream Cheese Frosting:
- 8 tbsp(120g) of butter
- 2 cups(250g) of powdered sugar
- 8oz(225g) of cream cheese
- 1 tsp (5ml) vanilla extract
- A pinch of salt
- NOTE: (You may not need all of the cream cheese, it is up to you how much cream cheese you want but it is best to get small amounts at a time to get the perfect consistency you want with your cake pops.)
To make your cake pops even better, we will dip them into melted chocolates.
- 2 cups (360g )Chocolate (Dark, White or Regular)
Now that you have all the ingredients for your cake pops, let’s start making them.
The 15 Steps To Make Your Cake Pops!
STEP 1. Pre-heat the oven to 350 degrees F
Make sure to always pre-heat your oven before you start anything else. It is one of the most important rules when it comes to baking. It doesn’t matter what you bake, either it’s a pasta, cake or bread.

Pre - heat the oven to 350 degree F Via Leaf
STEP 2. Lightly spray oil on your cake pan
You can actually use either spray oil or just rub some oil on your pan. But it is still best to get a cake sheet so that the cake will come out as smoothly as it can be although you shall not forget to remove it from the cake.

Lightly spray oil on your cake pan Via craftybaking
STEP 3. Sift all the dry ingredient
In a large bowl, sift together all the dry ingredients
Do the same with the wet ingredients in a separate bowl

Sift all the dry ingredient Via craftsy
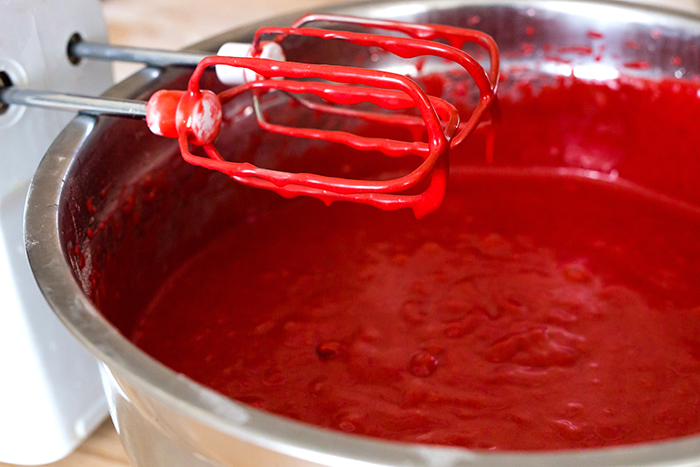
STEP 4. Using a mixer
Mix all the wet and dry ingredients until the batter well combined and ADD THE RED DYE
STEP 5. Cook for about 25-30 minutes
You can use traditional cakepop pan here
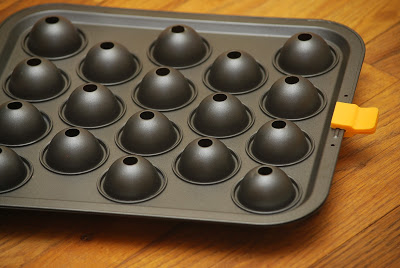
cakepop pan via My story in recipes
or you can use a more advanced technology like Cake Pops Maker Kit

Flip-Over Complete Cake Pops Maker Kit via Amazon
After that, let it cool before taking it out of the pan.
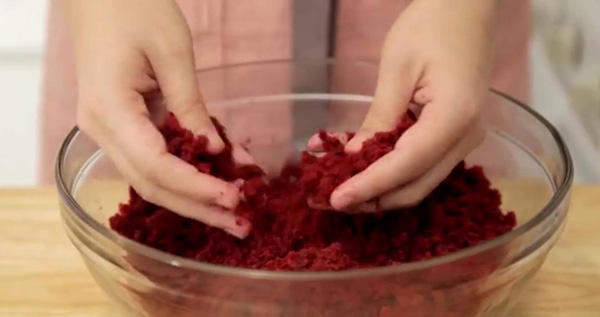
STEP 6. CRUMBLE your cake into a bowl
It is best to make sure your cake is nicely crumbled using your hands so that there are no chunks on your cake pops.
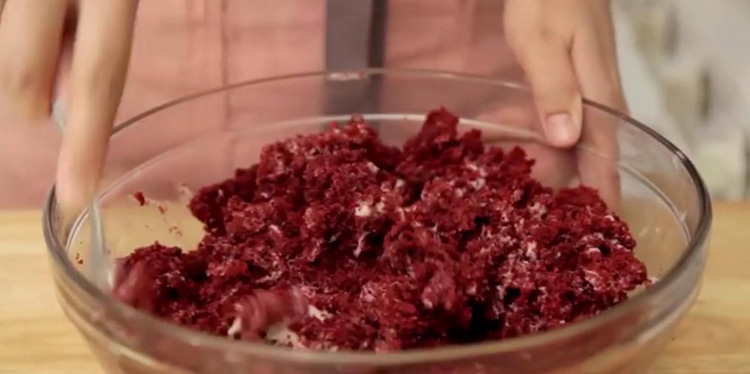
STEP 7. Mix
Mix all together with your Cream Cheese Frosting
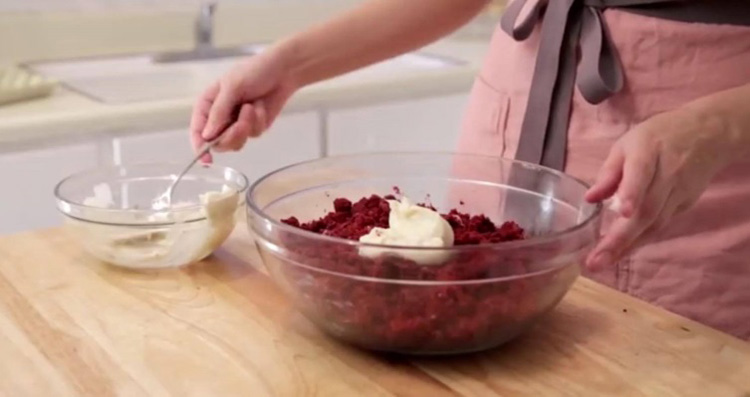
STEP 8. Add the cream cheese
Once the cream cheese frosting is ready, slowly add them to the cake
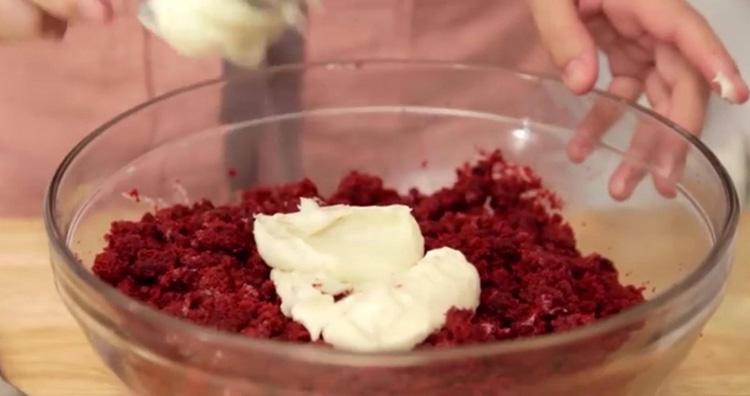
(Make sure to add little at a time to get the right consistency you want for your cake pops)
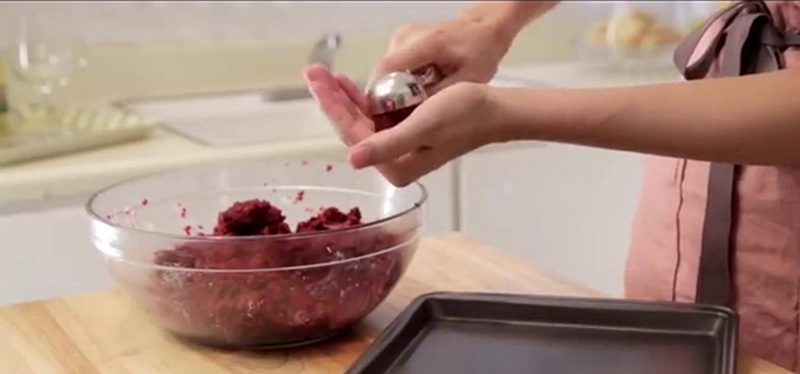
STEP 9. Take one small scoop
Take a small scoop (about 2 tbsp) in your hand and roll the mixture into a ball. Place it onto a baking sheet and repeat the step until mixture is gone.
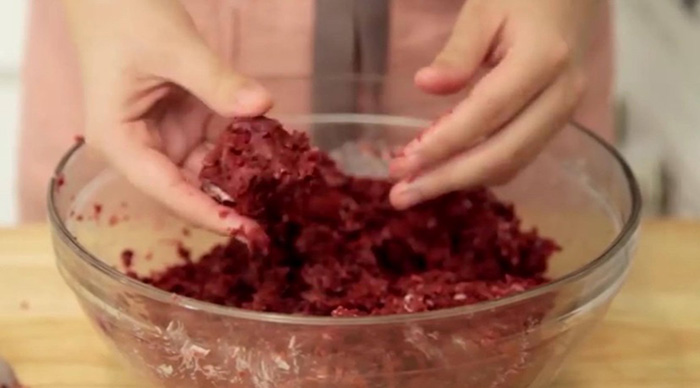
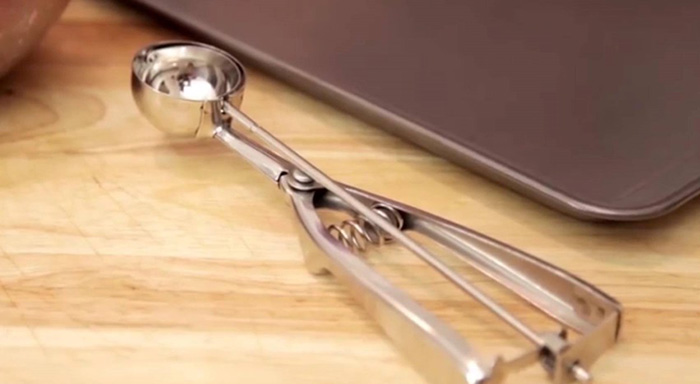
If you want your cake pops to be equally précised, you can use a scooper like this one to make sure your cake pops are even.
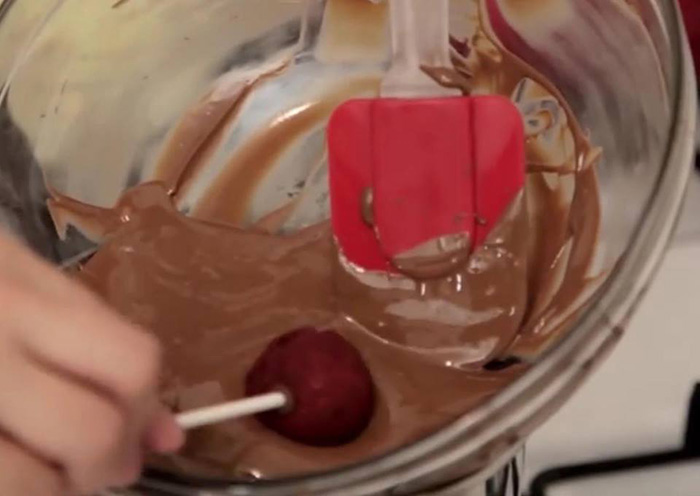
STEP 10. Melt the chocolate
Using either a microwave in slow increments on a low temperature or use a double boiler (tempering the chocolates)
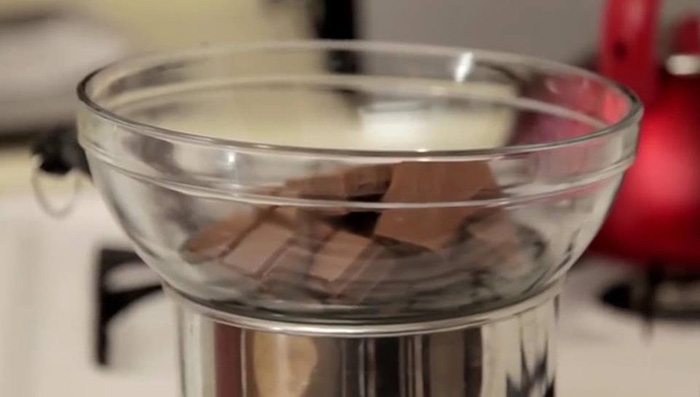
You can sure any type of chocolate you want.
STEP 11. Get a stick
And stick it into your melted chocolate. Afterthat, place it into your cake ball about 1/3 of the way in.
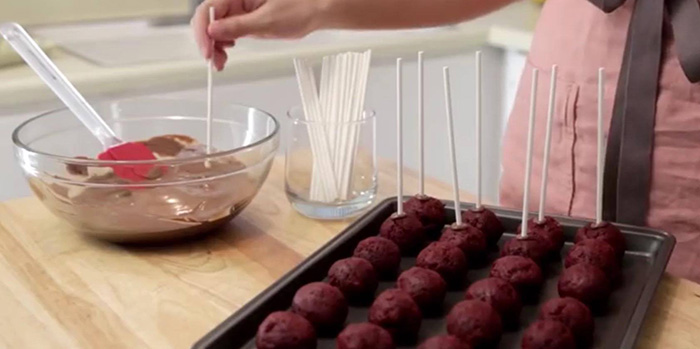
With this tutorial, we are using plastic straw sticks which is the most common sticks for cake pops

STEP 12. Place your cake pops in the fridge
Take a fridge for 20 minutes to set or 10 minutes in the freezer.
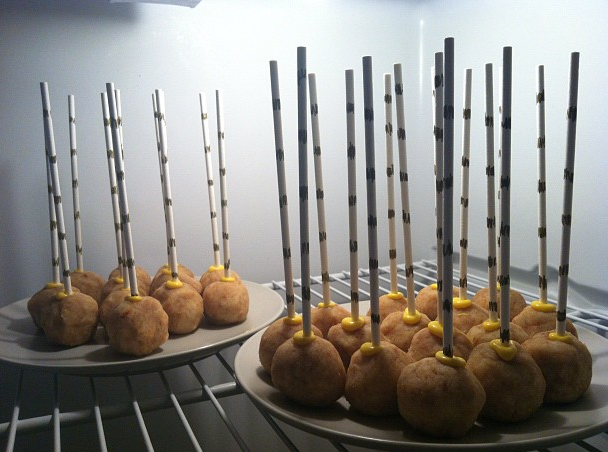
cake pops in refrigerator via MyKCBakes
STEP 13. Once your cake pops are ready
Afterwards, dip them into your desired type of chocolate.
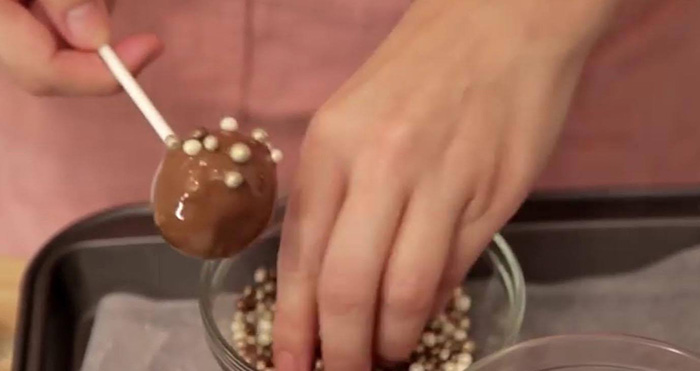
STEP 14. Decorate your cake pops
Now you are ready to decorate your cake pops
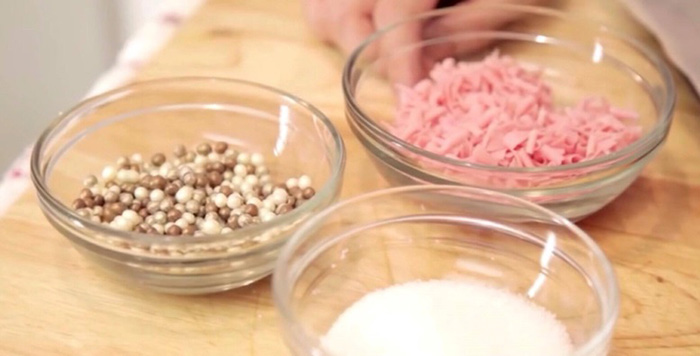
You can put any type of decoration you prefer on your cake pops.
STEP 15. Place them into the fridge
Once your done, place them into the fridge for about 10 mins to let the chocolate set.
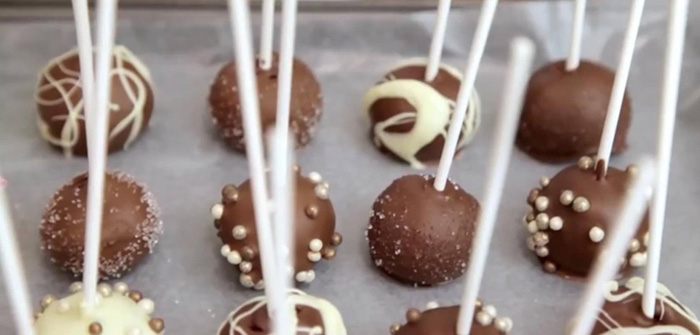
And there you have it! Your Red Velvet Cake Pops dipped in Chocolate
FAQ Tips and Tricks
Why is it important to mix the dry and wet ingredients separately before mixing it all together?
By mixing the dry ingredients separately and whisking them a bit before adding them to the liquid mixture, you are making sure that the baking soda, powder, and salt get evenly distributed throughout the flour.
Which is better, Liquid, gel or powder for cakes?
Liquid Dyes- are readily available in the baking aisle of most grocery stores and this type of dye is water-based. They come in tiny squeeze bottles which allow you to drip the dye and drop them little by little to your mixture until you reach your desired tone.
*This is the ideal dye for cakes*
Gel Dyes- typically comes in small bottles that contain thick-gel type liquid. Because the color is more concentrated, a smaller amount will impart a much more vivid color. This can be tough to incorporate into some types of cookie dough.
Powder Dyes- this type is ideal for tinting when no moisture is allowed. But this type of dye can only be found in specialty shops, this cannot really go into cake batters but mostly for meringue and macaroons.
Why is make cake pop falling out of the stick?
Don’t worry I have made the same mistake during my first time but the real trick for this is:
- After you dip each cake pop, you need to remove the excess coating. The key to keeping your cake pop on the stick is by keeping this process short and gentle
- Do NOT vigorously bang or shake your cake pop because it will surely fall off.
- Do a “tap and turn”. Gently tap your cake pop on the side of your bowl and turn it a quarter to keep the coating smooth and even.
CONCLUSION
And there you have it. You can now make your very own Red Velvet cake pops. Just make sure you follow the instructions above and you won’t have to worry about anything.
It is okay to make mistakes on your first few tries, I have made mistakes too. It is just a matter of practice and in due time you will make your perfect cake pops.
If you have any more questions or concerns about this BEGINNER’S GUIDE ON HOW TO MAKE RED VELVET CAKE POPS recipe, don’t be shy to ask and I will be honored to answer them for you.
And if you liked this recipe, share this to your friends and family so you can all make cake pops together.
Thank you so much for this clearly instructions as Cake Pops are my favorite holiday cake ever!
Thank you, Lena. Yish you have great days!